本文中に配置するイラストレーターは、アートボードぎりぎりの大きさにすると、InDesign上で調整しやすいです。
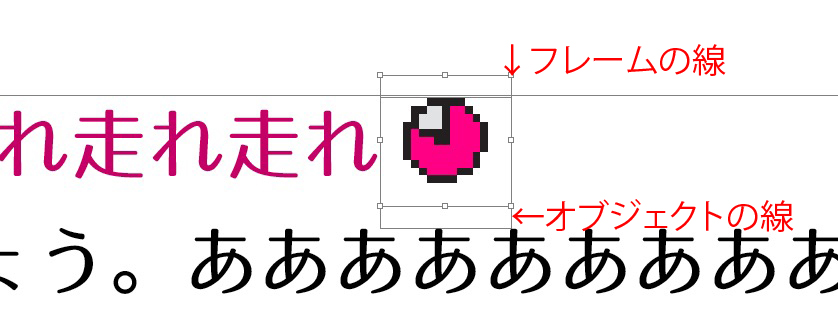
下の配置例は、
①フレームとオブジェクトの枠が揃っていない。
②枠が大きい
イラストレーターのデータは、ぎりぎりまでアートボードを小さくします。
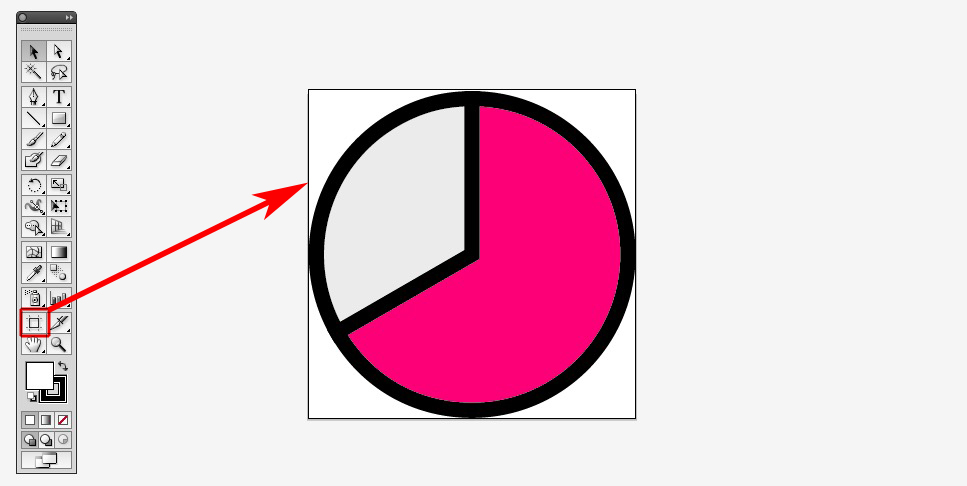
InDesignに配置します。
オブジェクトが少々揃っていなくても

オブジェクトを選択して、

文字スタイルをあてれば、
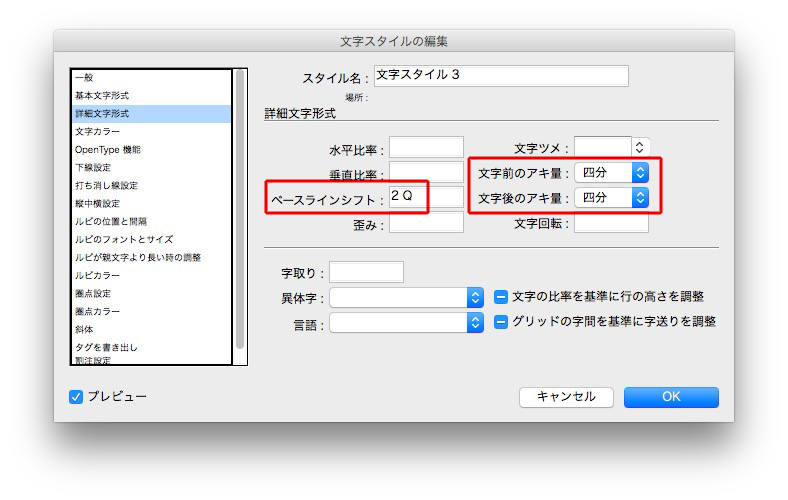
簡単に調整できます。

ベースラインも字間も正確に調整できます。
InDesign特有の意味不明な事故も防げます。
正規表現は見よう見まね
本文中に配置するイラストレーターは、アートボードぎりぎりの大きさにすると、InDesign上で調整しやすいです。
下の配置例は、
①フレームとオブジェクトの枠が揃っていない。
②枠が大きい
イラストレーターのデータは、ぎりぎりまでアートボードを小さくします。
InDesignに配置します。
オブジェクトが少々揃っていなくても
オブジェクトを選択して、
文字スタイルをあてれば、
簡単に調整できます。
ベースラインも字間も正確に調整できます。
InDesign特有の意味不明な事故も防げます。
Warning: Undefined array key "images" in /home/typeface/dtp.to/public_html/design44/wp-content/plugins/comment-image/plugin.php on line 29
OK!